利用公网服务器加速gradle构建总结
利用公网服务器加速gradle构建总结
前言
你需要一台拥有公网IP的服务器,请勿用于非法用途!!!
下载
- singbox //我就不提供下载方法和路径了
- nssm //点击前往官网下载, 自行安装, 自行配置环境变量, 不懂就问ai
服务端配置
请自己生成证书密钥对,自行替换目录,自行修改密码
1
2
3
4
5
6
7
8
9
10
11
12
13
14
15
16
17
18
19
20
21
22
23
listen: :80

tls:
  cert: /path/to/server.crt
  key: /path/to/server.key

auth:
  type: userpass
  userpass:
    tianxuan: txpsqwer
    honor30: hpsasdfqwer
    pixel4: ppsasdfasdf
    matepad104: mpsasdfasdf

trafficStats:
  listen: :2134
  secret: psasdfsafsdafasdf

masquerade:
  type: proxy
  proxy:
    url: https://bing.com # 伪装网站
    rewriteHost: true
singbox客户端配置
- json文件中记得删除所有注释性文本
//以及后面的文字 - 本配置不会让singbox以网卡模式运行,而是监听了
socks:1212端口和http:1222端口,所以任何想要通过代理来加速的软件都要手动配置本地代理,这里后续会讲到.
1
2
3
4
5
6
7
8
9
10
11
12
13
14
15
16
17
18
19
20
21
22
23
24
25
26
27
28
29
30
31
32
33
34
35
36
37
38
39
40
41
42
43
44
45
46
47
48
49
50
51
52
53
54
55
56
57
58
59
60
61
62
63
64
65
66
67
68
69
70
71
72
73
74
75
76
77
78
79
80
81
82
83
84
85
86
87
88
89
90
91
92
93
94
95
96
97
98
99
100
101
102
103
104
105
106
107
108
109
110
111
112
113
114
115
116
117
118
119
120
121
122
123
124
125
126
127
128
129
130
131
132
133
134
135
136
137
138
139
140
141
142
143
144
145
146
147
148
149
150
151
152
153
154
155
156
157
158
159
160
161
162
163
164
165
166
167
168
169
170
171
172
173
174
175
176
177
178
179
180
181
182
183
184
185
186
187
188
189
190
191
192
193
194
195
196
197
198
199
200
201
202
203
204
205
206
207
208
209
210
211
212
213
214
215
216
217
218
219
220
221
222
223
224
225
226
227
228
229
230
231
232
233
234
235
236
237
238
239
240
241
242
243
244
245
246
247
248
249
250
251
252
253
254
255
256
257
258
259
260
261
262
263
264
265
266
267
268
269
270
271
272
273
{

  "log": {

    "level": "info",

    "timestamp": true,

    "output":"logs.txt"

  },

  "dns": {

    "servers": [

      {

        "type": "https",

        "tag": "tx",

        "server": "223.5.5.5",

        "server_port": 443

      },

      {

        "type": "local",

        "tag": "ls"

      },

      {

        "type": "https",

        "tag": "cfg-google-dns",

        "detour": "vps-proxy",

        "server": "8.8.8.8",

        "server_port": 443

      }

    ],

    "rules": [

      {

        "rule_set": "cfg-cnsite-rule",

        "server": "tx"

      }

    ],

    "final": "cfg-google-dns",

    "strategy": "ipv4_only"

  },

  "inbounds": [

    {

      "type":"socks",

      "tag": "socks-in",

      "listen": "0.0.0.0",

      "listen_port": 1212

    },

    {

      "type":"http",

      "tag": "http-in",

      "listen": "0.0.0.0",

      "listen_port": 1222,

      "sniff": true,

      "sniff_override_destination": false

    }


  ],

  "outbounds": [

    {

      "type": "direct",

      "tag": "direct-out"

    },

    {

      "type": "hysteria2",

      "tag": "vps-proxy",

      "server": "112.212.132.12", //替换ip为你的公网IP

      "server_port": 80,

      "password": "pixel4:asdfasdfqwe",//替换为userpass下面的用户:密码

      "tls": {

        "enabled": true,

        "server_name": "bing.com",

        "insecure": true

      }

    }

  ],

  "route": {

    "rules": [

      {

        "action": "sniff"

      },

      {

        "ip_cidr": [

          "192.168.0.0/16",

          "10.0.0.0/8",

          "172.16.0.0/12",

          "127.0.0.0/8",

          "fc00::/7",

          "fe80::/10",

          "::1/128"

        ],

        "outbound": "direct-out"

      },

      {

        "protocol": [

          "bittorrent",

          "quic"

        ],

        "action": "reject",

        "method": "default"

      },

      {

        "protocol": "dns",

        "action": "hijack-dns"

      },

      {

        "rule_set": [

          "cfg-cnip-rule",

          "cfg-cnsite-rule"

        ],

        "outbound": "direct-out"

      }

    ],

    "rule_set": [

      {

        "type": "remote",

        "tag": "cfg-cnip-rule",

        "format": "binary",

        "url": "https://github.com/MetaCubeX/meta-rules-dat/raw/refs/heads/sing/geo-lite/geoip/cn.srs",

        "download_detour": "vps-proxy"

      },

      {

        "type": "remote",

        "tag": "cfg-cnsite-rule",

        "format": "binary",

        "url": "https://github.com/MetaCubeX/meta-rules-dat/raw/refs/heads/sing/geo-lite/geosite/cn.srs",

        "download_detour": "vps-proxy"

      },

    ],

    "final": "vps-proxy",

    "auto_detect_interface": true,

    "default_domain_resolver": {

      "server": "ls",

      "strategy": "ipv4_only",

      "client_subnet": "218.29.136.42"

    }

  },

  "experimental": {

    "cache_file": {

      "enabled": true

    }

  }

}
nssm配置后台运行
win + r 运行 cmd 命令行输入 nssm install singbox, 注册安装一个服务, 名字无所谓 参考配置,
path指的是你要运行的文件在哪儿,包含文件全名startup directory指的是你要在哪里运行这个文件arguments指的是你运行这个文件还要附带说明参数
填完以上参数后,相当于nssm会帮你自动依次执行:
- 打开cmd,
cd /path/to/startup_directory,/path/to/singbox.exe run并且还没有cmd这个黑窗口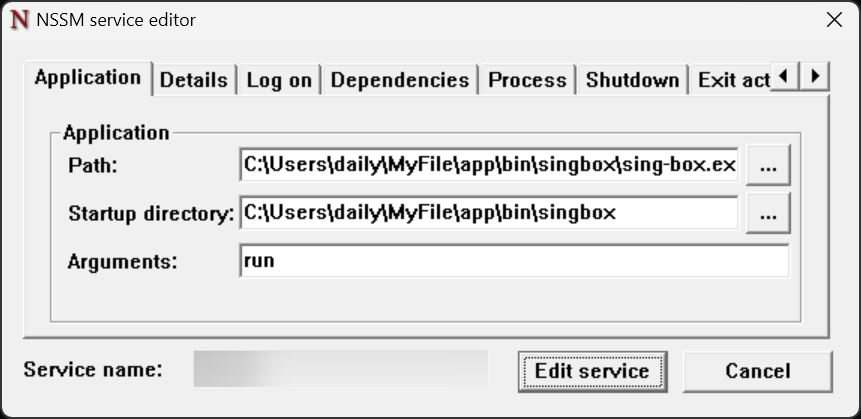
配置完成后,你可以在任务管理器-服务中找到它, 不过此时还没配置完,需要将singbox客户端配置config.json放到singbox.exe的同级目录下,例如:
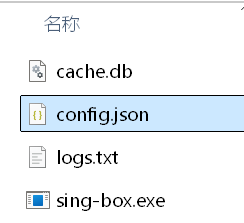
cache.db文件不用管,那是singbox运行后自动生成的.
启动singbox服务
在任务管理器-服务中, 找到singbox, 右键-开始, 几秒钟如果显示正在运行而不显示已暂停,那就说明你的配置对了
配置系统代理
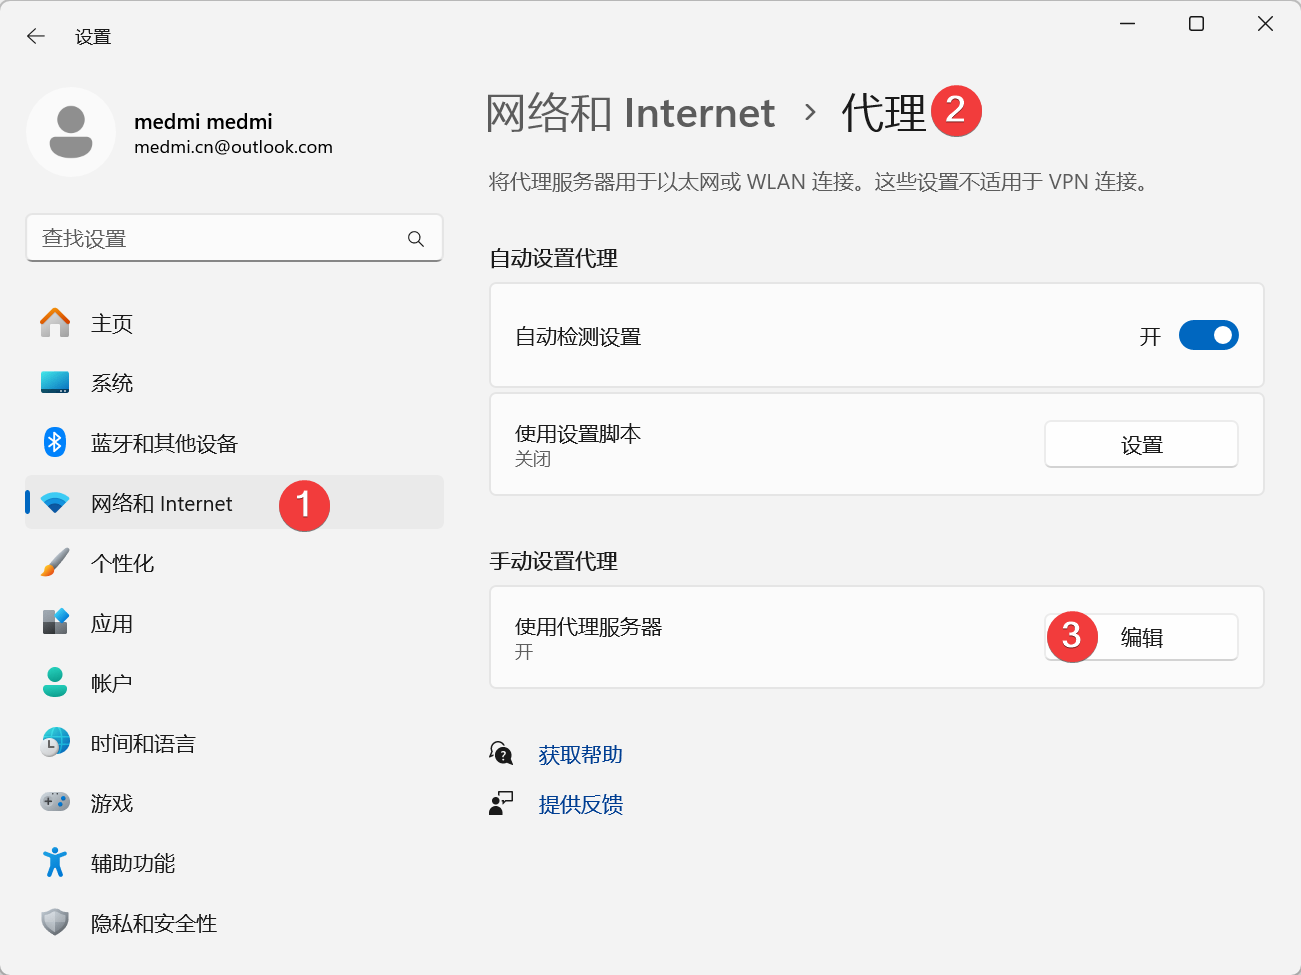 配置如下
配置如下 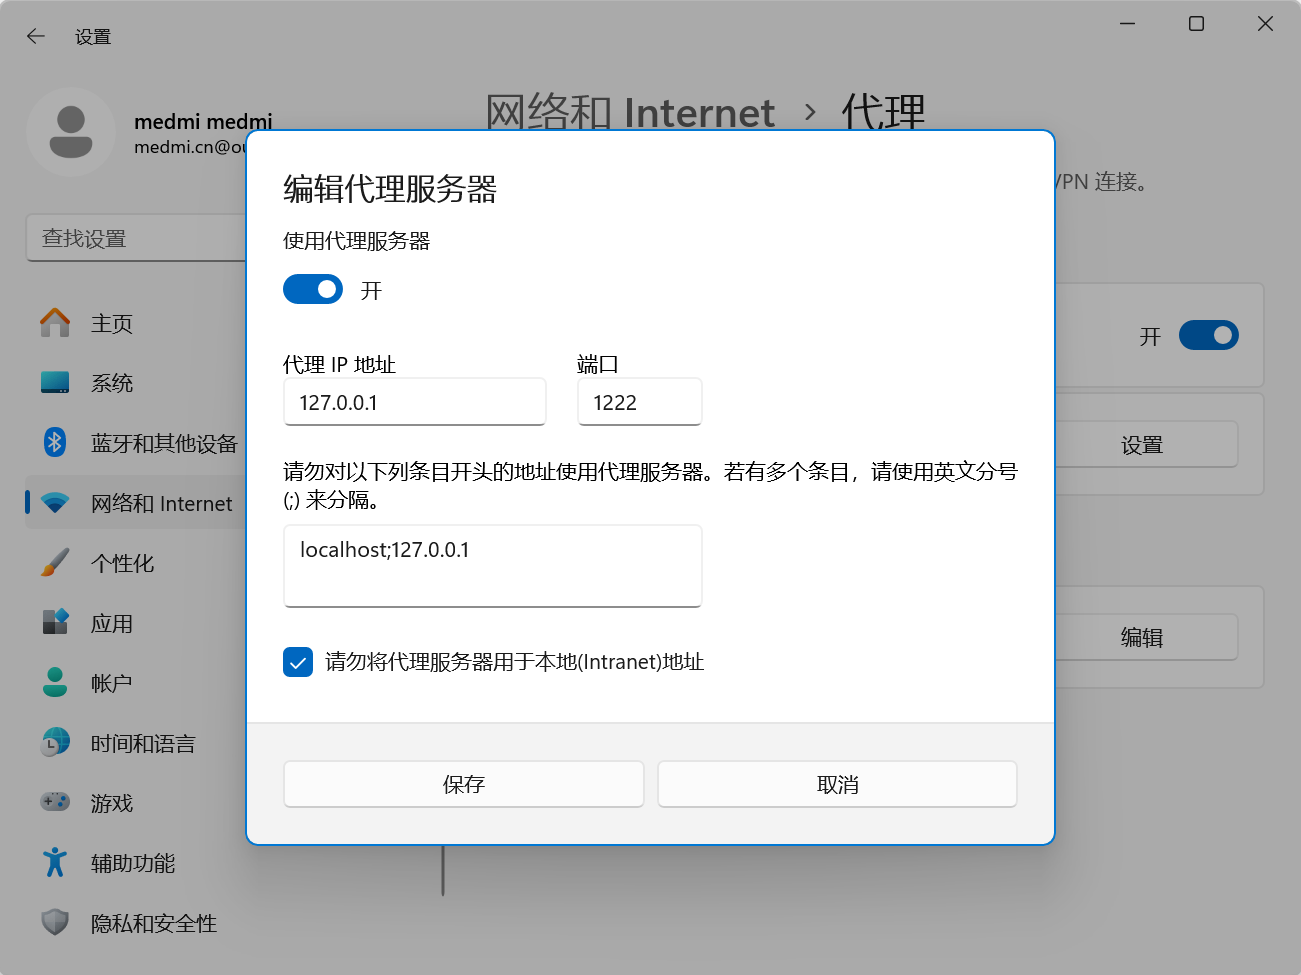 此时打开
此时打开IDEA等jetbrains工具就不会卡了
本文由作者按照 CC BY 4.0 进行授权